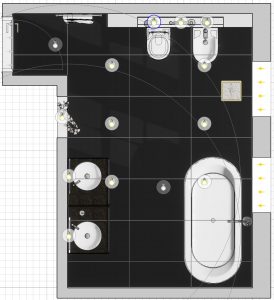
Use the submenu Light to adjust lighting in your project. Sometimes you will want to make your project or part of it brighter or darker. Besides
ViSoft Premium uses four different types of lights:
Point lights: equally dissolving inner lights;
Spotlights: narrowly shaped inner lights creating a circle with a thin ray of light;
Portal lights: outer lights entering through apertures such as windows, doors or holes; independent of the sunlight;
Sunlight: outer light source entering through apertures, which casts shadows in regard to its position.
Point lights are set automatically by the program in regard to the shape and size of your room. Portal lights are also set automatically for each aperture. You may manually add additional point lights as well as spot lights. Each light can be switched on / off. You can also set properties like position, radius, brightness and color for each of the lights.
Position of light sources can be set in 2D views Floor and Wall or in 3D. When setting brightness it’s recommended to switch to

By clicking the button Inside Lights all point and spotlights that exist in your projects are enabled. When you click button Sunlight you will switch off all of the point and spotlights. Portal lights of windows and holes will be enabled as well as the sunlight. You may still manually switch the sunlight and all other lights on or off and use them in any combination.
Use submenu Lights to set point, spot and portal lights. Use submenu Sun & Sky to set the position and brightness of the sun as well as sky settings.
Light tab
Use the button Point Light and Spot Light to place lights in the room. Use the properties to edit color, brightness and radius amongst other things. Global highlight sets the general light value.
The button Properties opens the window Light properties with extra settings, as temperature and IES light profiles.

Turn drop shadow on or off. Use Temperature for a warmer or colder color (Kelvin: below 5500 is warm, above cold). IES light profiles create a realistic bundle of light. The profile you choose is visible both in 3D-view and in Phototuning.

Display light cones in 3D (spotlights only)
Setting the lights is often a precise job. To see the effect better, enable a high light selection. In 3D-view open the context menu (right-mouse click), select 3D settings> highlight selection. The direction and radius of the spotlight

Sun & Sky
Position of the sun’s rays can be viewed in 2D floor view. This makes it easier to adjust the position of the sun. On the image below you can see how the sun’s rays come in (the yellow areas).

If you want to replace the background in ViSoft with an image, sky or 360-photo, visit this article.
