Before you start:
Check if you have administrator rights (if not, contact your IT-department) and if your antivirus software lets you install ViSoft. When in doubt, shut it off for the duration of the installation.
You can find the system specifications for ViSoft Premium here.
Close all other programs and make sure you have a stable internet connection if you are installing the online setup.
Send an email to info@visoft.de if you wish to receive an installation file to test ViSoft.
The installation:
Start the .exe file out of your download folder. Follow the steps in the program. After the installation, the pc needs to be restarted. Then you can start ViSoft P
Registration and activation without a dongle
Extend the following information when you are installing for online license. Otherwise, you can skip this step.If you are using ViSoft for the first time as a new customer you need to create a new account. Please use the same e-mail address as the one you used for ordering ViSoft.
Fill in all your contact info and hit register. After registration, you will get a confirmation mail, check your spam folder if you do not see it in your inbox. Using ALT + TAB you can switch to your email program (without closing the installation).
Log in.
After registration, you choose the option to try out. A rental (online) license works without a dongle. In this case, a stable internet connection is needed to start ViSoft. If you bought ViSoft with a dongle, plug it in now (you still select try out). A migration tool will appear in the update manager, which transfers your license to your dongle.
Remote Assistance
A ViSoft Teamviewer shortcut appeared on your desktop. This program allows us to log in remotely to your pc to assist you when you have a question or problem. Please start the Teamviewer application before calling. If you use an own TeamViewer, close it before starting the ViSoft one.
Firewall Settings
Your Firewall security might block the ViSoft update server. The following addresses need to be accessible for ViSoft to be able to install updates, grant them access in your firewall settings:
91.250.86.216 : Update Server
Libraries
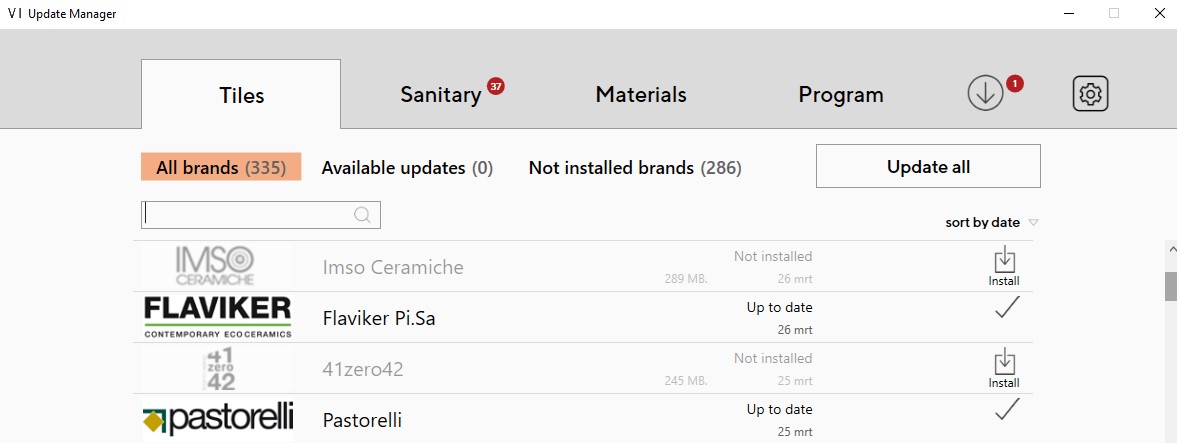
After installation, you can start choosing which tile- and sanitary brands you want to use. In ViSoft, open the update manager and select the needed brands. You can close the update manager, it will keep downloading.
Projects path
In ViSoft under File > Settings > tab Common(
Network installation ViSoft data files
After the installation of ViSoft, you can choose to set some of the data in a network folder to share with multiple users.
All paths are saved in the settings.xml file in the Userdata folder.
The settings.xml can be changed on one pc and then be copied to all other PC’s with ViSoft installed.
Close ViSoft before you change the settings.xml file. You can find a more detailed explanation of network saves here.
| Network paths | Installation with dongle | Installation online (no dongle) |
|---|---|---|
| Software | C:\ViSoftCreative | C:\ProgramFiles\ViSoft\ViSoftPremium |
| Utils | \Utils | \Utils |
| Data | C:\ProgramData\ViSoft\ViSoftPremium | |
| Sanitary | \Arge | \Arge |
| Tiles | \tiles | \tiles |
| UserData | \Userdata | \Userdata |
| Projects | \Projekte | \Projekte |
Save location of Tile boards (Created with the board assistant)
C:\ViSoftCreative\Tiles\boards\
Save location of Tile patterns (Created with Tile > patterns)
C:\ViSoftCreative\Tiles\patterns\
Save location Murals Library (Grouped sanitary objects)
C:\ViSoftCreative\Data\CustomMurals\</custom_mural- folder>
Save location sanitary library
C:\ViSoftCreative
>The locally installed sanitary library can be found at c: \ViSoftCreative\Arge. Move all the folders to the network location. Don’t add Arge in the path, otherwise, ViSoft will create an extra
For example, F:\ViSoftCreative is correct, place the