Some manufacturers in the updatemanager are ‘locked’. To get access, you have to get permission from the manufacturer. Contact your agent or wholesaler: he or she will get the permission from the manufacturer. Communicate your ViSoft Customer ID to the manufacturer and ViSoft. You can find your Customer ID in ViSoft under Help > Registration info. 

After receiving the permission forward it to ENTERMAIL to get access. The mail of the manufacturer needs to contain their logo.

When you have received the green light, download the brand with a rightclick > Start download immediately.

You can rotate an object a few different ways. When placing an object from the sanitary browser you can use the following hotkeys to rotate them while placing:

  • ALT aligns the object to the wall.
  • CTRL rotates the object on its axis.
  • SHIFT locks the horizontal axis, this way you can move an object up or down.

Another way to rotate an object is to use the modify object function.

Example

If you want to place a flush plate flat on a surface. First try it with the hotkey Alt, if this doesn’t work use the modify object function.

In the modify object menu select rotate and turn it around the correct axis.

Now you can change the Mounting height and the distance X and Y in the object properties to place the flush plate perfectly on the surface.

It can happen that transparent objects are displayed a bit weird on renders.

This situation occurs when normals of the transparent object-oriented inward, so Photo-Tuning engine cannot calculate glass material correctly.

To solve this difficulty normals of the object need to be recalculated and then flipped to achieve the proper orientation

Example of a shower screen:


You can solve this issue with the Modify object function in the Sani menu.

In the modify object window, first select recalculate normals, set Smooth threshold to zero and click on apply.

Second, select flip faces and apply.

The render after correction:

If this doesn’t work, try to reduce the reflection of the object. In menu View | Material select the object material and then reduce the reflectivity in the parameter menu on the right.

Murals can be used to create a furniture piece with washbasin. When you have designed your own sanitary object with murals, you can save it in your own database in the sanitary browser. Skip steps 1 to 3 if you have your mural object ready.

Step 1

Place a block with the following properties:
Width: 50 cm
Thickness: 120 cm
Height: 10 cm
Mounting height: 60 cm

Step 2

Draw a free hole on the block. Set the grid on 1 cm so you can accurately draw the opening. Set the depth of the hollow at 8cm, to create a bottom of 2 cm.

Step 3

Rightclick on the mural and select Save to library or Save to custom database. When you choose the latter, the object is saved without properties in the sanitary database under .custom objects > default. You can copy the object to another serie and edit the properties (from context menu). If you choose to save to library, the window Save Custom Mural opens. Click on the export to file… button and save the ViSoft3D-file on your computer. Press cancel.

Step 5

Open the sanitary browser. Open a serie from the .Custom objects database.
Rightclick > Add object. Fill in the properties, like the mounting height and mounting pivot.
Pivot = 0: bottom, Pivot = 1: Top, Pivot = 0.5 the heart.

In the article Edit objects you can read how to change the material and geometry of a custom object.

Materials such as the fabrics of towels contain ‘maps’ to create a realistic view. In this article the concepts of diffuse maps, bumpmaps and displacement maps are explained and how to use it in ViSoft. The effects are mainly visible after rendering with phototuning.

There are two ways to add maps to an object.
1) Add or copy the object to .custom objects in the sanitary browser. Open the Object properties. Go to tab material and open advanced parameters. Open the objects parts browser or select the material you want to edit in the preview. Now you can load/edit maps.
2) Open menu View | Material and select the material you want to edit. Under simple and advanced parameters you will find the maps.

Diffuse map

A diffuse map is a texture image that contains a colormap, like the image below.

Bump map

Bump mapping is a technique in 3D-visualization to simulate details such as bumps and wrinkels on the surface of an object. A bump map contains a gray-scale image of the texture. The detail that is generated is simply an exposure trick, polygons are not actually added to the 3D object.


A round object without maps.

The texture gives the illusion of depth on the ball.

Displacement map

When a displacement map is used, the texture of an object is actually adjusted. Instead of a depth illusion such as with bump mapping, the texture is ‘moved’: depth and height are added to the surface to create relief.

The displacement map below is used on the ball and gives the following result after rendering in ViSoft :

Compare the different effects of the bump and displacement map in the image above. The same texture is placed as a bump map on the front ball. On the second ball, you can see the texture of the displacement map again.

Thee website 3D Textures offers free and complete texture sets with displacement maps, normal maps, diffuse and more.

On vismats.com you can download a lot of free material images. You can import the images as custom material in the Material Library.

The sites listed below have interesting information and 3D objects to download.

(Click on the logos to go to the site)

e-interior Information about new objects, mostly furniture. also 3D-objects for download Free
3d-warehouse Millions of 3D objects available for download, using drag & drop you can put them directly into ViSoft. Free
bimobject   A lot of architectural objects but also lighting and furniture. Free
polantis   Mostly architectural objects but also textures Free
victoria-en-albert   Objects like Baths, Basins, and faucets Free
vitra Design Furniture Free
tf3dm A mixture of 3D objects Free
yepsketch A mixture of 3D objects $ 49,95 per year
Materials and 3D objects Free
3D Export Free 3D objects Free
Texture Haven High-quality textures free for download Free
HDRI Haven High-quality HDRIs free for download Free

Take note: a 3D object should have a maximum 25,000 polygons.

The following file formats can be used:

    • Autodesk 3Dstudio (*.3ds)
    • WaveFront Object (*.obj)
    • Collada (*.dae, *.xml, *.zip)
    • DirectX (*.x)
    • Blitz3D (*.b3d)
    • WRML97 (*.wrl; *.wrz)
    • *.dwg

Sometimes it is necessary to rotate an object; e.g. a handle from HEWI.

Go to menu Sanitary and click button Modify object.  naar menu Sanitair en klik op de knop object bewerken. Click on button Rotate. Under modifier options change the rotate degree on Y.

A deep link shows product information on the website of the manufacturer or wholesaler. It uses the order number to show the product properties on the site.

In the sanitary browser select an object, click on the button Extended Info and open the deep link tab.

To set up a deep link, right-click on a manufacturer, and select properties.

A new window opens. Click on the Deep link settings icon.

Enter the Deep Link, e.g.: https://pro.hansgrohe-int.com/suche.htm?searchtext=

If you have a login and password, copy the example.

Now the products are linked; making quick access for ordering possible.

Open the layers menu by clicking the button Drawing layers in the lower taskbar. Depending on the menu (tile, sanitary, output…), you can (dis)enable layers for the working area.

Drawing layer in menu Sanitary
Drawing layers in menu Tile
Drawing layer in in 3D-view
Parallel Projection

Parallel projection enables you to further customize the appearance of 2D-view. Reflection and shadows can be shown too.

Clipping distance

With this function, you can define the depth of the projection plane. This means you decide up to which distance to the selected wall or mural objects will be shown. Standard setting is Auto which means ViSoft automatically calculates which objects are visible. If you want to make further away objects visible, deactivate the auto function and enter the distance. The bigger the distance the more objects you see. Settings for the clipping distance have to be set individually for every plan.

Parallel projection is off
Parallel projection with automatic clipping distance

Use a block mural to place a built-in bath with a panel beneath (and light).

Place a built-in bathtub and use the sanitary mural function to finish the built-in. Or do it yourself: place a block mural and use the Cut Out Filling function.

Set the mounting height of the bath at 15 cm, so there is empty space underneath the mural.

Use wall view to place and edit a new block (menu Room | Mural).  Select all the objects and make it a group (CTRL+G). Now you can tile the mural, place a light, e.g.

In menu View| Material you can easily edit the materials of walls, murals, objects and other surfaces. Select the surface or object you want to change. A preview appears in the right menu. Open the Material library to select and place material. It’s also a possibility to import custom material based on an image, use for example textures from Vismats. Use the tabs simple and advanced to add or change bumpmaps and reflection etc.

In this article is explained how to build in straight and round bathtubs, using the sanitary mural function or doing it manually using murals.

Built-in bath using the sanitary mural function
Manually build-in bath with block
Built-in round shaped bath using the sanitary mural function
Round freestanding bath built in a block 

NOTE THAT: Not all baths are placed correctly with the sanitary mural function, depending on the 3D model. It can happen that there is a small gap between the bath and wall, causing errors in the tiling plan (tiles will be placed in the gap). Check in Wall-view if the mural of the bath is placed against the wall, it will be shaded in grey. If not, you will have to draw a mural manually. See under second heading.

Bath is shaded in grey, indicating it’s placed against the wall
Placing a built-in bath with the sanitary mural function

Choose the bath you want to build-in in the sanitary browser. Adjust the mural height and size where necessary, so that the bath fits nicely.

Press Ok to place the mural. You can double-click to move the bath. If you wish to edit the mural freely, you need to ungroup the mural and bath. The free construction options will then be available.

Manually build-in bath with block

First, place the bath in the room. Go to menu Room | Mural to place a block.

Doubleclick on the block, use the white rectangles to drag the block to the correct size. Set the height of the mural a couple of centimetres lower as the height of the bath.

Go back to menu Sani and press the button Cut out filling to remove the mural inside the bath. The mural is ready to be tiled now!  

Built-in round bath using the sanitary mural function

Open the sanitary browser and place a round-shaped bath. Press the sanitary mural in menu Sani. Choose for a smooth shape. Pay the attention to segment length, this is important for the tiling.

Go to menu Tile | Place | Tiles and select tile you want to use. Go to mural view and use the button mural faces to place the tiles on the bath mural. In the image below you can see the tiling is a bit off.

To solve this, add or delete segmentation points. Go to menu Room | Mural. Open the explorer on the left side. Ungroup the bath and mural. Go to floor sight and double-click on the mural to open the free construction options. Now you can add or remove segmentation nodes. Select a node to remove, or select a line to add a node.

Round freestanding bath built in a block

Place a round bath, in the example below a bath from the Vitra – Istanbul serie is used.

Place a block until the centre of the bath.

Right click on the block and select convert into free mural.

Select the button line. Add two nodes en place them on the outer bath frame.

Select the line between the two nodes. Click on to arc. Drag the arc in the opposite direction, until it flips inwards.  

Place the arc against the bath frame.

The mural can be tiled.

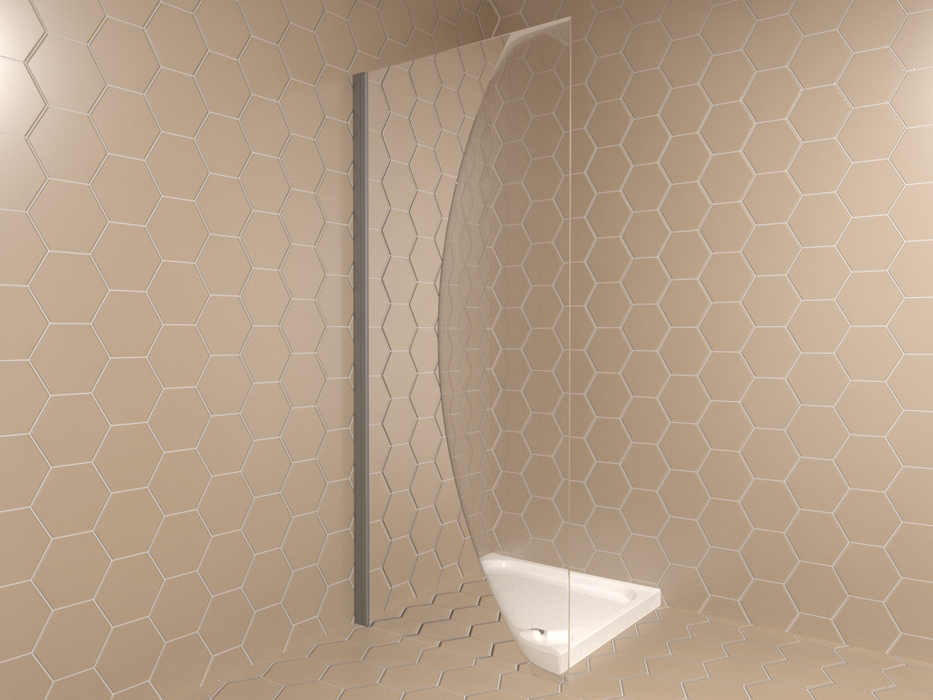
Use murals to make your own customized sanitary objects, like marble fontains, built-in baths or sinks. First, place the sanitary object. Second, place a free mural. Set the height of the mural a couple of centimetres lower as the sanitary object. It is possible to edit the mural to make an arc e.g.

If you wish to create a built-in bath, read this article. In this article, you can read how to create a custom undercounter basin or a washbasin built created with murals.

Under counter washbasin (undermount)

Place a block in the room (menu Room | Mural). Set the properties, for example, width 80 cm, thickness 60cm, height 3cm. Set the mounting height to 83 cm.

Go to menu Sani and place an under counter basin. In the example one is used of the series O.novo / Villeroy & Boch. Use floor and wall-view to center the bashin precisely on the mural. The tools in the bottom toolbar are very useful for this.

Use the tool Cut out filling in menu Sani. The under counter washbasin assistant opens. If needed, edit the margin cut. Press OK.

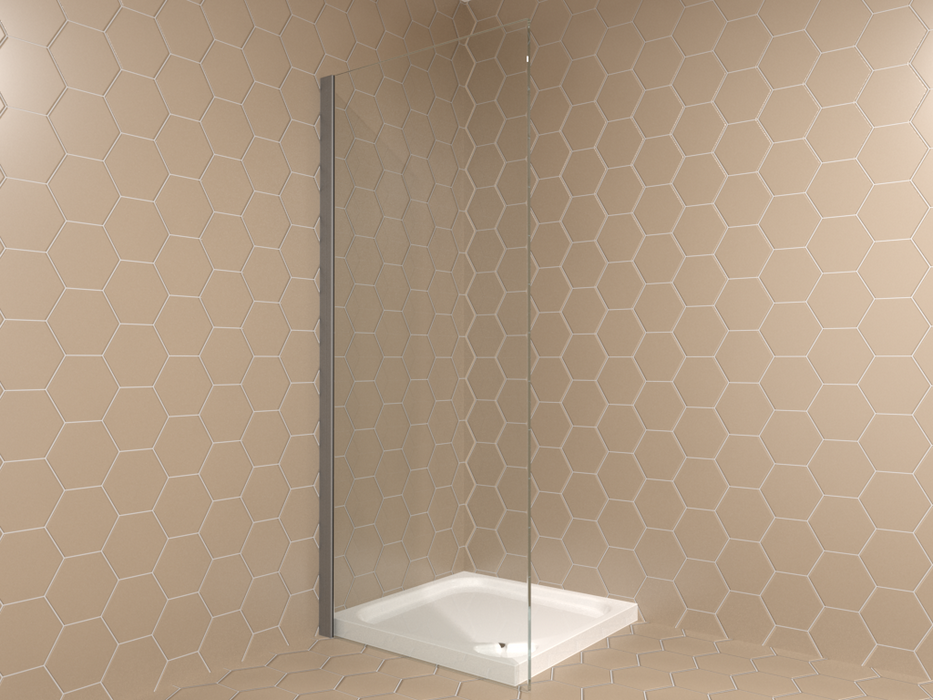
Finish the basin, add tiling or material and other sanitary objects.

Custom washbasin

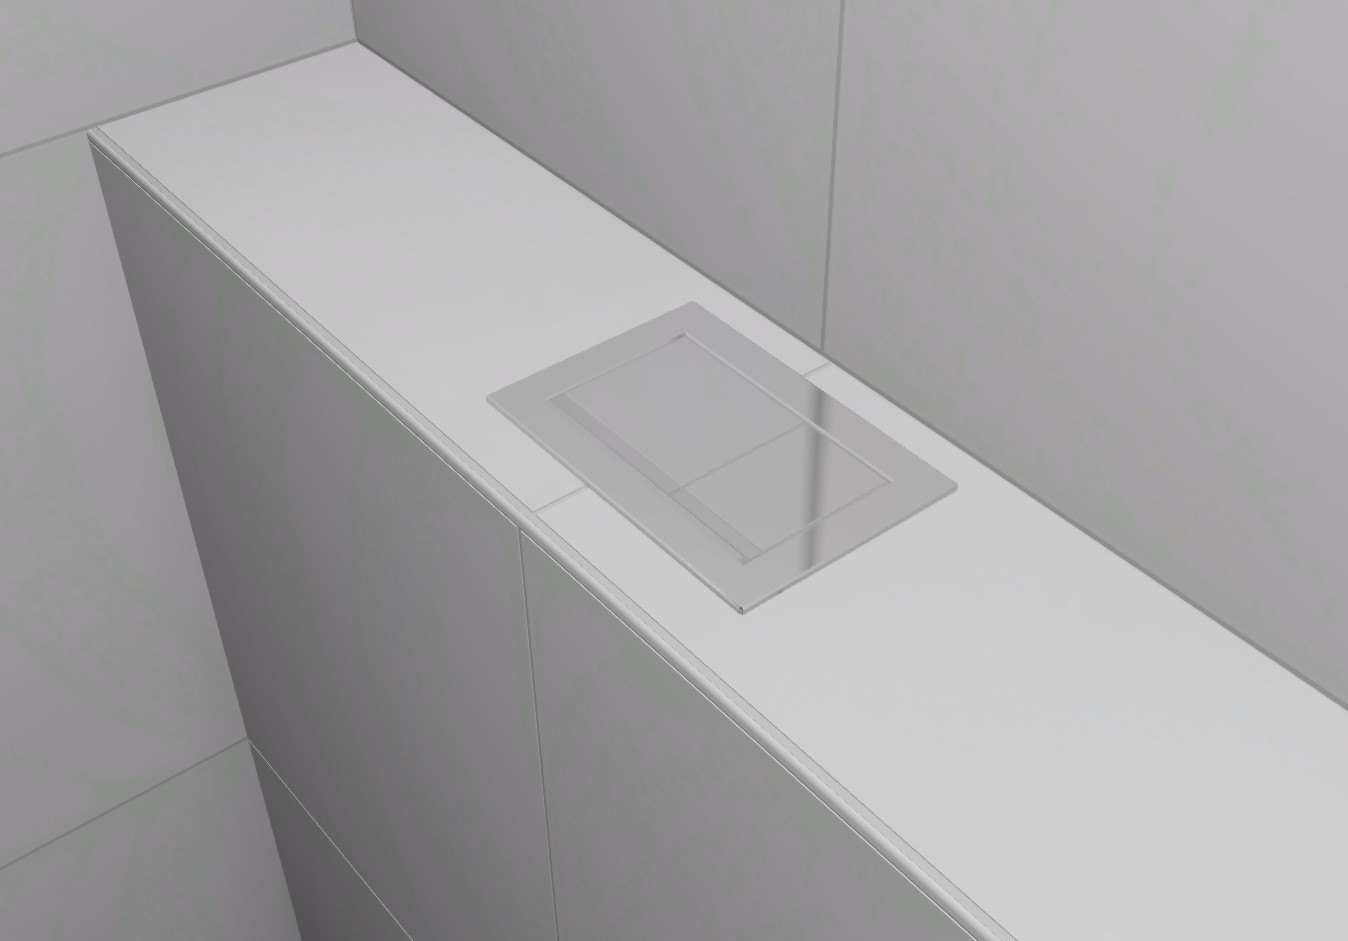
You can create a custom washbasin, using only murals. Go to menu Room | Mural and press Free divider. Make sure snap is on and put your grid on 5 cm (lower toolbar). Start drawing. Set the path construction options to thickness 5 cm and direction left.

When you connected the endpoint to start point, right click and select End drawing. Set the height under properties at 6 cm.

Select free mural and draw a rectangle inside. Set the properties at 2 cm.

Go to mural-view. Select free again, and draw a corner like in the picture below. Go to floor-view to set the width properties correctly.

Murals are automaticly tiled when using auto-bords or the all walls button. To avoid this, draw a region over all the mural areas (menu Tile | Region). Use mural-view and the navigation board to select the areas.

Place material on the surface. Open the material library in menu Tile |Place |Material and select ceramic or custom material e.g. Hold CTRL to paint the material on the surface. If you want to save your custom washbasin, group the murals. Drag a rectangle and select Group from the context menu.

Open the context menu again, and select save to Library. Save the object to your custom mural library, or use export to file…to save on your computer. Share it with other ViSoft users and import the object in .custom object in the sanitary browser.

In ViSoft you can adjust the object however you like. It is not possible to modify an object in the database of the manufacturer (protected), but you CAN copy the object to .custom objects and make changes to the object or tile there.

Copy the object you would like to change, and paste it in .custom objects serie. Rightclick and select Properties. Edit the order number to avoid a wrong order. Open the tab Geometry and click Edit parts. Select a part you like to edit in size or to delete. Check that the lock is disabled.

Object parts browser

Open the Object parts browser to get an overview of all the parts (button left of object preview). You can select multiple parts by selecting and pressing CTRL. Use the Highlight selection button to see which parts are selected. The other parts are shown in wireframe.

To edit the material, open the material tab. Select a part you wish to edit the material of, and browse through the templates.

It is possible to add light to a certain part of the object. Open the light tab and add a point or spotlight. You can set all the properties for the light as well.

ViSoft is a open software, which means you can create all the objects and textures you desire. It’s possible to import any object of the following file formats:

    • Autodesk 3Dstudio (*.3ds)
    • WaveFront Object (*.obj)
    • Collada (*.dae, *.xml, *.zip)
    • DirectX (*.x)
    • Blitz3D (*.b3d)
    • WRML97 (*.wrl; *.wrz)
    • *.dwg

Use drag & drop to import objects and textures; its very easy to drag the downloaded file from the internetbrowser to ViSoft Premium. The object is loaded en can be placed in the room or added to your own library.

.Custom Objects library

In the sanitary browser you can add your serie with custom objects. Rightclick on .Custom tiles (or objects) and select Add Series. Fill in the name and description of the new serie. It’s also possible to import and export series from the .custom database to other ViSoft installations.

Objects and tiles in the custom database can be modified. Read more on how to edit objects or tiles.

The websites below provide interesting objects and textures for downloads: 

(Click on the logo to visit site)

e-interior  Interior blog, provides info on new design and lots of 3dfiles. Free
3d-warehouse Really extensive library, which is also integrated in the ViSoft sanitary browser. Free

Texture Haven

High-quality textures, free to download. Free

HDRI Haven

High-quality HDRI’s, free for download Free
bimobject   Lots of architectural products, as well as furniture and lighting. Free
polantis   Mostly architectural objects but textures as well. Free
victoria-en-albert   baths, armature, sinks Free
vitra Design interior Free
tf3dm A wide range of 3D objects Free
yepsketch A wide range of 3D objects $ 49,95 per year
Materials and 3D-objects Free

3DTEXTURES

Textures Free

If you want to use combinations of objects in the future, you can save them in the library. First, you have to group the objects. Select all the articles in wall-view, holding CTRL or drag a rectangle over all the articles. Right-click and select Grouping > Group (or use hotkey CTRL + G).

The objects are grouped. Right-click again and select Save to library… or save to custom database…(object will be saved directly in .custom objects > default. You will have to edit the properties in the sanitary browser).

Save to library saves the group in the objects (mural) library. You can make new folders and save groups of objects. If you prefer to save a file on your hard disc or in the sanitary browser, use Export to file… You can import the group in the sanitary browser under .custom objects or even use the file in other software.

The function ‘Image board’ shows 2D images as 3D objects. You will need an image (png) with a transparent background.

Step 1

Look for a PNG image file with transparant background to use as image board.

Step 2

Go to Menu Sani | Sanitary and press the button Image bord.

Step 3

Go to .custom materials in the Material library.  If you want to make a new folder, open context menu on .custom materials and select add series.

Stap 4

Add the image > Select add material from image (right click in white folder space). Fill in the details under Material Properties if you like.

Step 5

Place the image board in the room. If you want to make adjustments, use the properties in the left menu.

Image board used in project